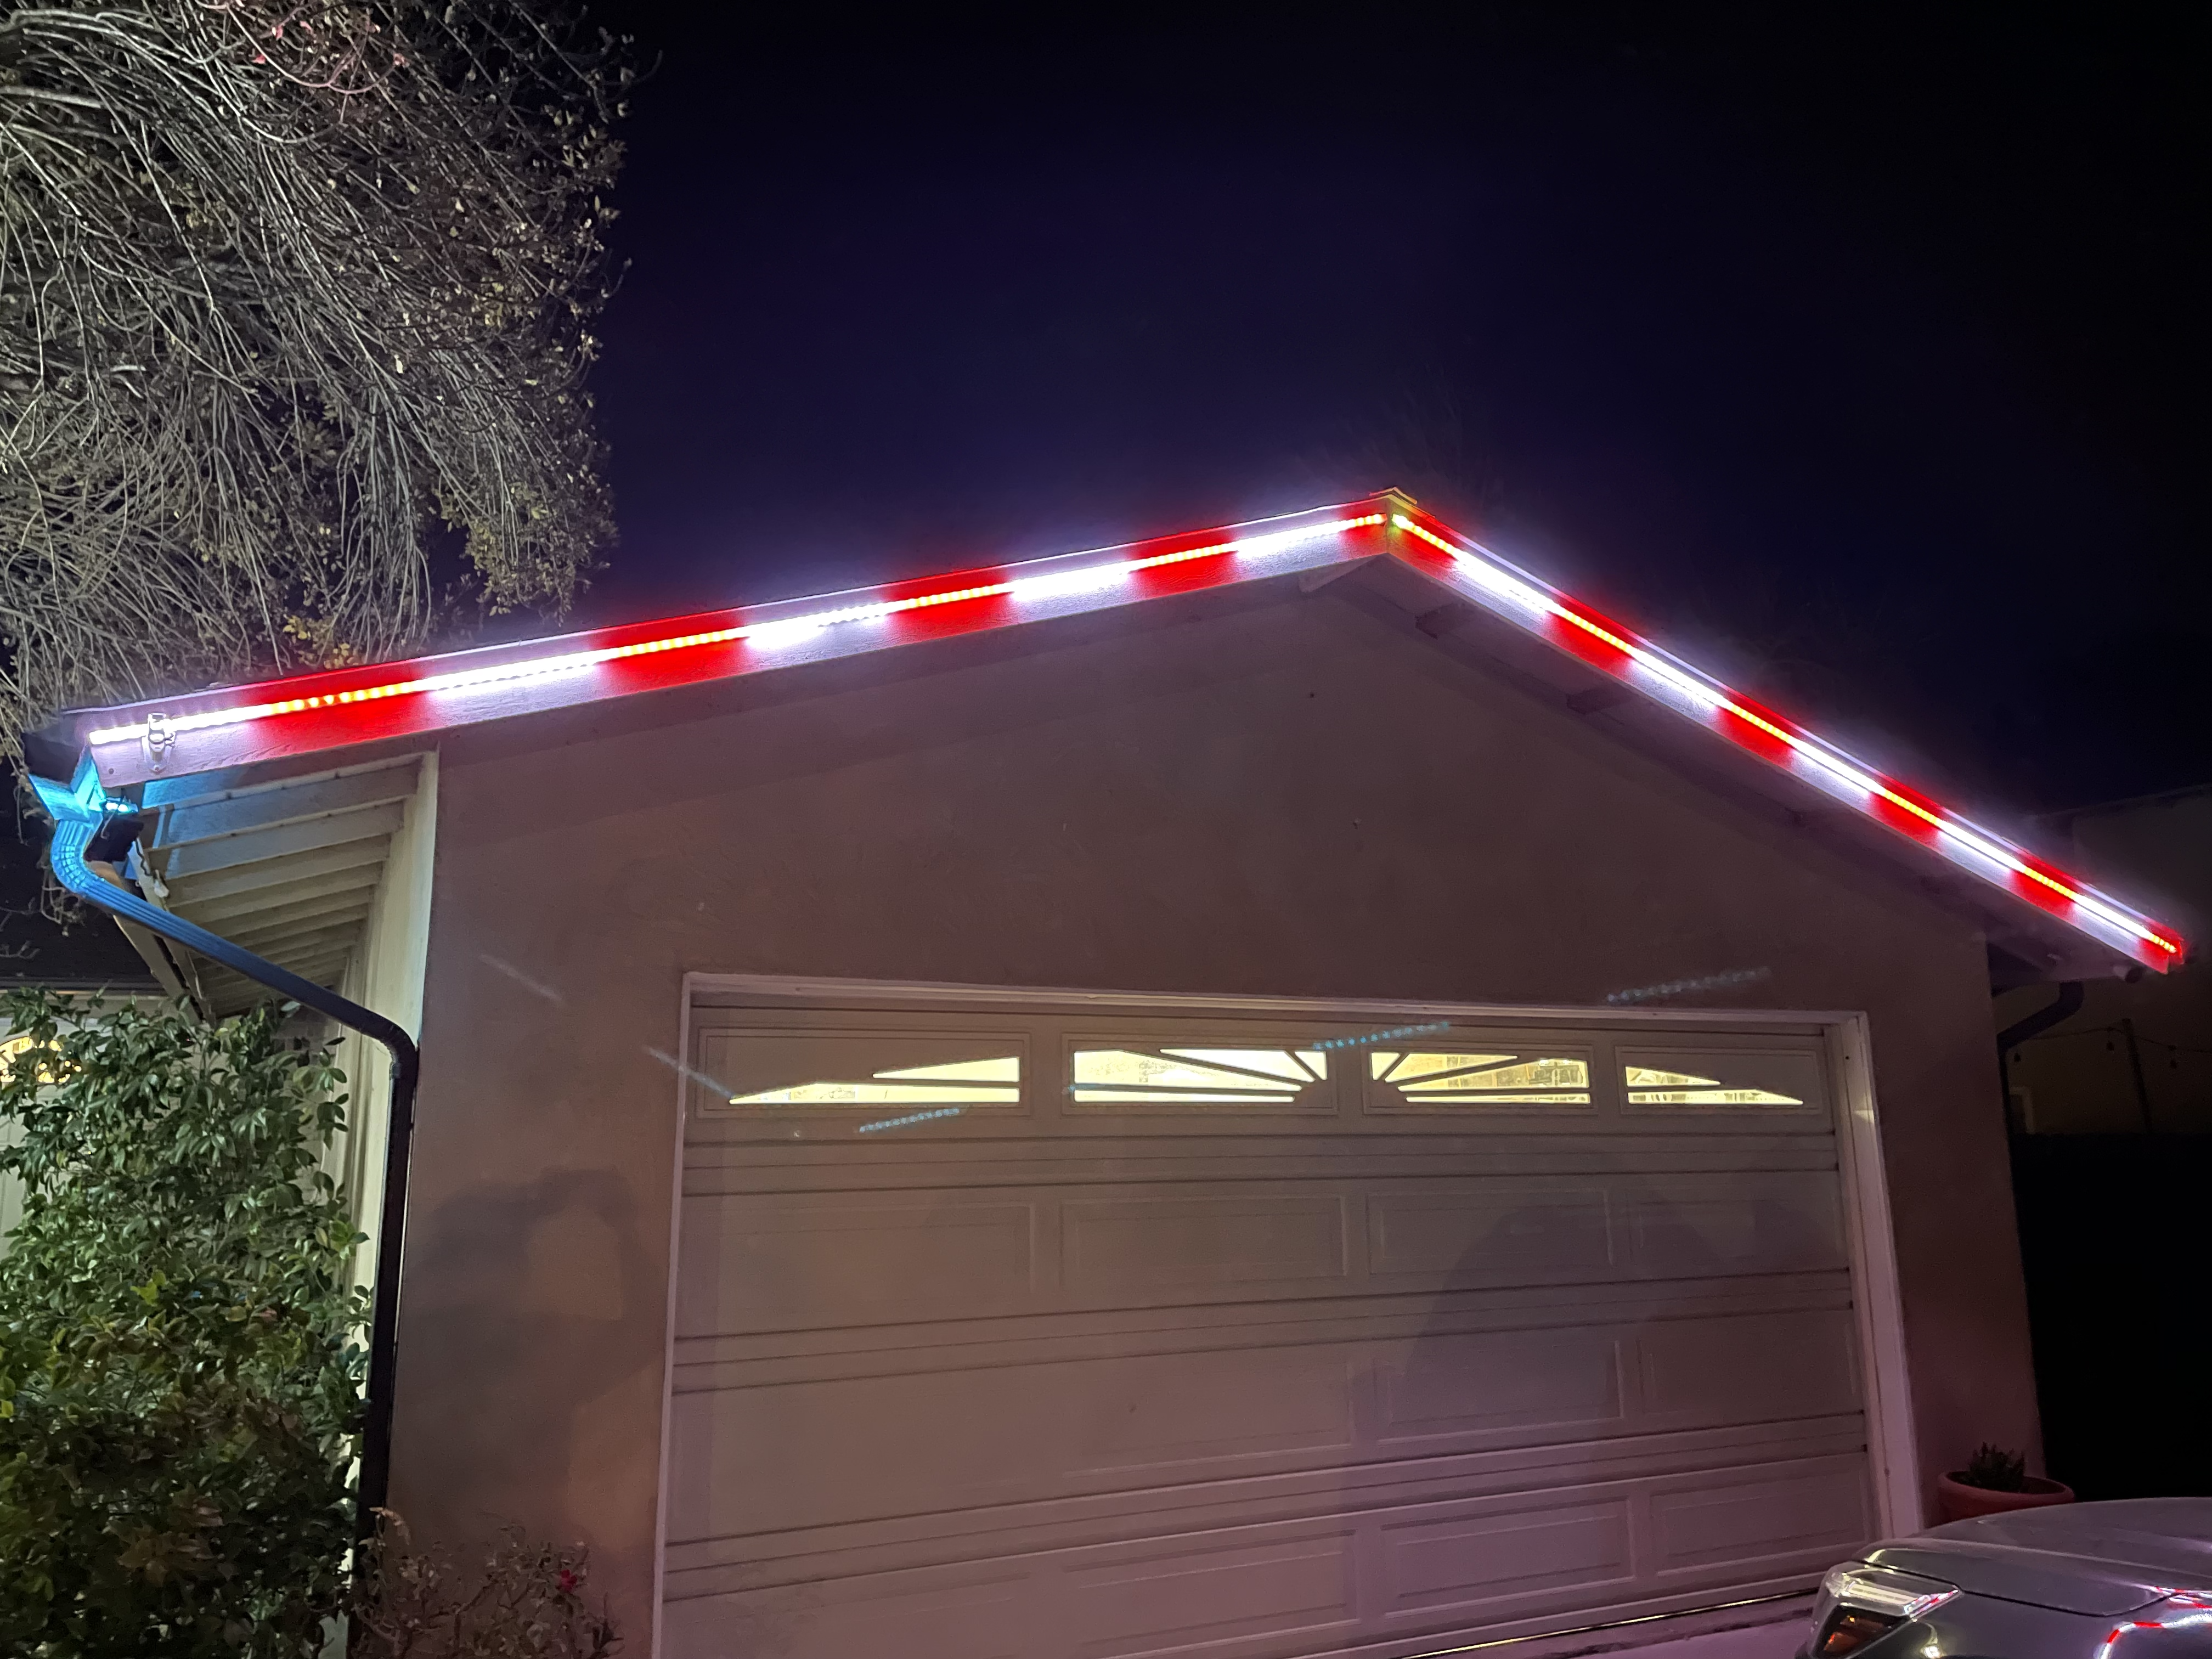
Permanent Garage Trim Lights
After years of wanting to have permanently installed house border lights, we finally got around to installing a couple of 150 WS2815 LED strips in aluminum channel frosted diffuser covers. After some research I found the QuinLED-Dig-Uno and bought one, figuring it would be the perfect starting point since they can be networked for future expansion. As an afterthought I decided to add a parallel run of RGBW LED strip on the back side of the fascia, as a house wash to complement the WS2815 strips.
This side project suddenly turned into my first time remixing parts from thingiverse, done within the flashforge slicer. Didn’t realize that the RGBW was a different size than the 2.5, so I got excited to find and print the perfect mount. After I printed the 2.5 mount and found the error of my ways, I was sad to find that there were no discoverable RGBW sized mounts with screw tabs for mounting to a backer board, so I set out to create one. After some slicing, rotating and rearranging I was able to come up with my own version:


TODO fix image galleries….
This ended up holding the RGBW perfectly and looks like it will mount exactly as needed to the plywood backing board. I found a mounting plate for the Dig-Uno and printed a copy. Once I got everything else mounted and wired up internally, I stuck it up in the peak of the roof where the both two strips of WS2815 and the two strips of RGBW will be terminating and the data and power lines enter the garage. Since there is an access point in the garage, I didn’t bother running ethernet for now, although I did pick up an ethernet equipped ESP32 when I bought my QuinLEDs. The external antenna mount is a 2" stainless steel angle bracket I had on hand from a past keggerator project that I drilled out with a step bit to fit the bulkhead mount. This version has a number of things I want to rework, to be continued later.

Outside, everything is run through a gap between a rafter and the stucco, since its an unfinished garage there was plenty of clearance. I drilled a hole in the fascia behind where the channel will be mounted, then ran the 4 wires for the LED strip and some 16 gauge THHN cable I had laying around for power injection. I am using both channels on the Uno, as I am feeding both sides of the roof line from the center, so everything is doubled up. Currently everything is massively overbuilt, as I was unsure of future expansion plans, but was hopeful. Early feedback indicates that we will be continuing on around the house, so rebuilding the control panel might entail switching to a DigQuad.
TODO get picture of the mess at the peak. Maybe we can cover it with a star?
Whats next
- Re-layout board
- Far end power injection (depending on future expansions)
- Use cut-offs to make a keystone to cover the cable mess
Original parts for reference and credit:
- RGBW DIN Mount: https://www.thingiverse.com/thing:4435764
- 12_DinRail_LRS350 from: https://www.thingiverse.com/thing:5375168
- Shelly 2.5 Mount: https://www.thingiverse.com/thing:3590665